You can generally take your chainsaw to a hardware shop and have it shortened there; however, if you don’t want to wait or would prefer not to, this primary step by step guide will assist you with shortening your chainsaw chain all alone.
- Necessary Tools
- A rivet device
- A chain-breaking tool
- Pliers
- Wrench
Before Beginning
- Always wear safety gloves and safety goggles when working on or with a chainsaw.
- Be sure that your chainsaw blade and engine are not hot from use. It would help if you allowed it to cool down on the off chance you have quite recently used your chainsaw before doing any work on it.
- Remove the spark plug to ensure there is no power running to the chainsaw.
Removing the Chain
- Locate the side cover, and use a wrench to remove the nuts or screws holding it set up. For the most part, the side cover is held set up with two nuts or bolts.
- Unlock your chainsaw’s brake if it is attached to the side cover, or probably you won’t have the option to put it back.
- Pull the chainsaw blade or bar away from the chainsaw marginally (you will hear it click); this will release the chain’s tension.
- Once the tension has been released, you can lift the chain up and off the saw.
Removing a Link to Shorten the Chain
1. Inspect your chain and locate the master link. If there is no master link present, proceed to step:
a) Open the master link; this may take some force and pop the link attached to it out by applying force with the pliers.
b) Attach the master link to the link next to the one you just removed and close it.
c.) Proceed to step 5.
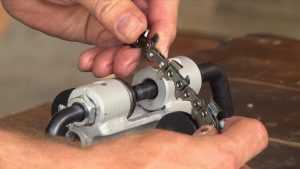
2. Choose which link you need to remove, and adjust the chain breaking tool with that link, and line up the push arm with the pin on one side of the link.
3. Turn the handle on the tool until the pin jumps out of the link.
4. Repeat steps 1-2 on the opposite side, and remove the chain’s link by giving it a slight force.
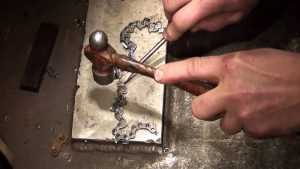
5. Put back the link that you just reconnected, or the master link, into the rivet instrument.
6. Twist the left handle while applying counter pressure to the right handle until the rivet is smashed flat.
7. Twist the right handle somewhat to move to the next rivet, and repeat step 6.
Reassembling the Saw
Here are the means on the best way to put back the chain on your chainsaw:
- Loosen the tension screw to make reassembly somewhat simpler. The tension screw is situated on the blade, between the blade and the chainsaw itself.
- Thread the shortened chain around the sharp edge, making a point to connect with the drive links in the sprocket.
- Pull the chainsaw blade marginally away from the chainsaw to give it a bit of tension.
- Seat the blade on the chainsaw’ adjustment pin.
- Replace the side cover and fix the nuts or screws by hand.
- Tighten the tension screw.
- Finish fixing the nuts or bolts on the side cover with a wrench.
Testing Chain Length
- Pull the chain up far from the blade, and afterward rapidly release.
- If the chain can be pulled away somewhat, without withdrawing the drive links, and later adjusts back accurately without sagging or dropping, it has appropriate pressure and is the correct length.
- If the chain sags or droops far from the sharp edge, you can repeat the entire procedure until you have removed enough links to make the chain the best possible length.
Hopefully, this article has helped you understand a lot about the subject.